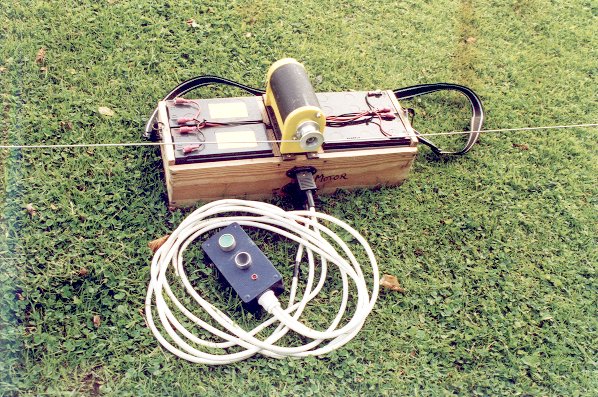
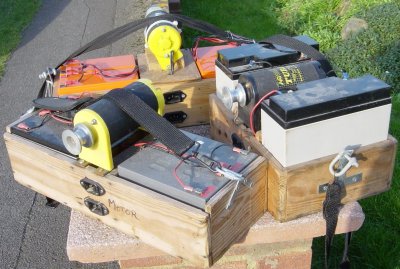
I have frequently been asked for details of my electric bear lifter. The picture below shows the one I knocked together for the 1996 season and lasted until early 2005. Your construction will vary dependant upon materials available.
This has now been replaced by an aluminium framed one. Lets see if that lasts 9 years. If it does it will probably see me out.
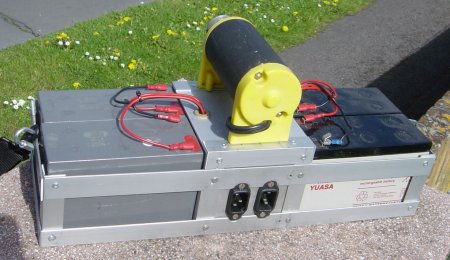
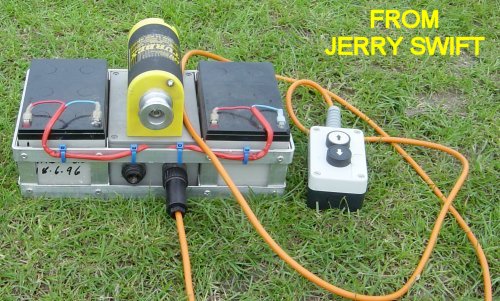
There are two main items you have to engineer around. The first of these is the motor. I tried motor cycle starters, model car motors, windscreen wiper motors and anything else I could find. There are many deciding criteria including voltage, current, torque, speed, reversibility, weight and mountings. I eventually settled on one used by hobbyists for starting model aircraft, boats or cars. These can be purchased at any good model shop and come from various manufacturers but are all very similar.
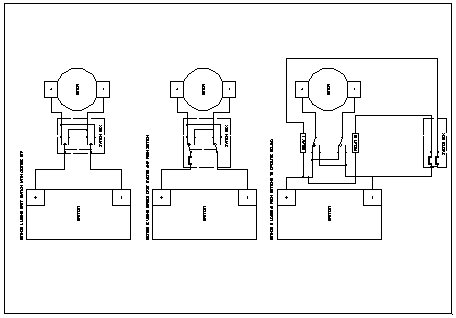
The next consideration is the battery(s). A lot of care must be given to this as any containing liquids can be very dangerous to transport and should be avoided. I prefer the sealed lead acid type as these do not have any chance of spilling hazardous chemicals and have very good capacity. The motor dictates the voltage so I use 12 volts. For a well attended 2 day event I find that I require a capacity of more than 20Ahr. The batteries are also used in my system to ballast the motor mounting and stop it kicking sideways under high torque. So that they can be distributed either side of the motor I find the most convenient to be 4 x 12V7Ahr or 2 x 12V15Ahr. These should all be wired in parallel and taken to the motor via a reversing switch. There are several ways of doing this as shown in circuit diagrams. or in Autocad.
If you are using SLA batteries you must note that these require the correct type of charge. A car battery charger will not do and will damage the batteries immediately. A constant voltage charger set to 13.8V must be used. They can be purchased at a reasonable price from Maplins or if you are into building electronics a simple circuit is shown here. Note If this type of battery drops below 10V they will not recharge to a state where they have any capacity and they are also very susceptible to low temperatures. (ie. don't keep them in a shed where they are likely to freeze during the winter)
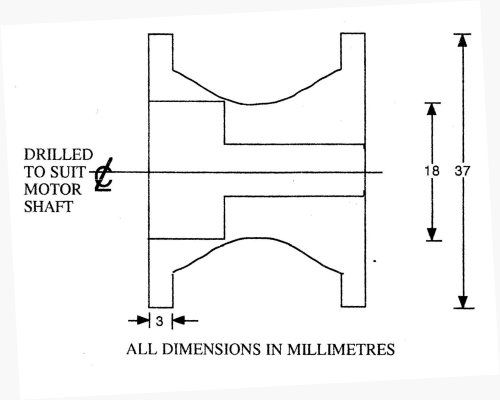
Whilst several people have managed to use the existing pulley by widening the belt groove with a file, this can still lead to the line running over its self and locking up. To cure this you have to remove the supplied pulley and replace it with a suitable capstan. I am lucky enough to have a brother-in-law who is handy with a lathe.
A single turn of line round the capstan should be sufficient. If not the wind is too light or the kite is too small. In either case they will not be sufficient to lift the bear. If the wind has picked up and the line is too tight the motor may over load or kick sideways and you will have to revert to the manual method.
Every thing has to be mounted in some suitable container that can be transported to the DZ. I find a shoulder strap very helpful if I have to carry it far. I use a wooden construction but I have seen very nice ones in aluminium frames, plastic tool boxes and even some fitted with wheels. Just use what you are comfortable with and have easily available.
Switches can be arranged in various ways. I like one button for "Up left" and another for "Up right" colour coded to match the drop rigs so that you know which one to press to send which drop rig up. If you put the droppers on the wrong side just change the direction of rotation of the line round the capstan. Another configuration is to use a 3 way switch giving "Left up"-"Off"-"Right up".
By doing the switching through a hand held unit the resistance in the wire slows down the motor where as using relays to do the switching in the motor box makes for a faster ascent but the acceleration can often lead to premature release and the impact on the top pulley can bend the release mechanism or even tangle it with the pulley. Making these leads plugable makes transport much easier. I also like to fit the unit with a socket for charging and this has the added benefit of being able to be connected to your car battery should your pack start to get tired.