I have included step by step pictures and clicking on them will enlarge the picture.
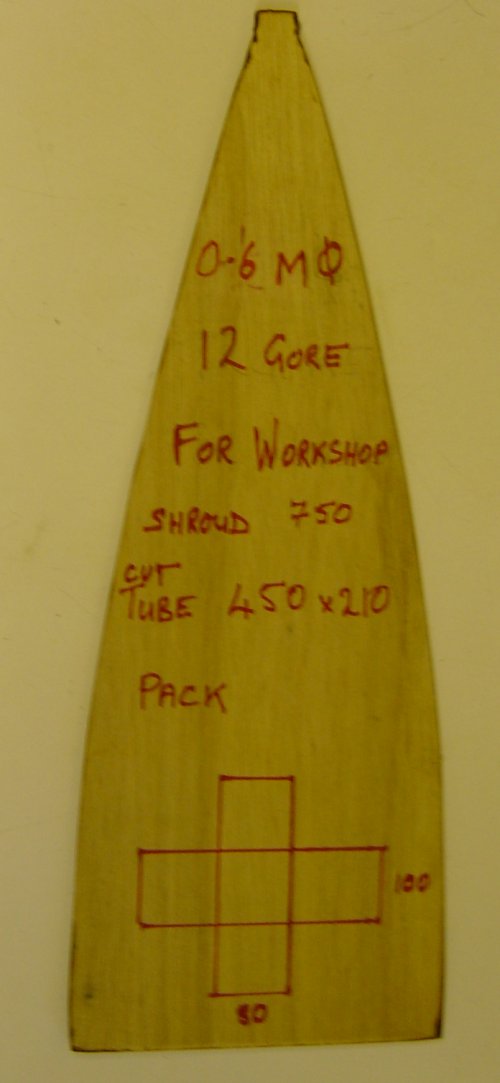
Having weighed your bear go to the gore calculator and try a few diameters to see how close you can get to the recommended weight. Next decide on the number of gores (sections) you wish to use. A guide is always 8 or more, an even number and the bigger the chute the more gores should be used. I start at 8 for a 0.5M diam, 12 for 0.75 and 16 minimum by the time I get to 1M. Now submit the program and print out the results.
On a sheet of thin card mark the heights up the vertical edge then horizontally the half gore width. When this is completed draw a smooth line through all these points and cut out the half gore template. ![]() Again on the thin card draw a vertical line perpendicular to the bottom edge. Line the straight edge of the half gore template with this line and draw round it. Then turn it over, align the straight edge to the line and draw around it again. This should now give you a full gore template with both edges identical.
Again on the thin card draw a vertical line perpendicular to the bottom edge. Line the straight edge of the half gore template with this line and draw round it. Then turn it over, align the straight edge to the line and draw around it again. This should now give you a full gore template with both edges identical. ![]() If you are only going to make a few 'chutes you can continue with this card template but if you intend to do a number I would advise transferring it to a thin ply wood sheet.Mark the template with diameter and number of gores for future use.
If you are only going to make a few 'chutes you can continue with this card template but if you intend to do a number I would advise transferring it to a thin ply wood sheet.Mark the template with diameter and number of gores for future use.
If you would like to skip some of the foregoing and would like a 10 gore 365mm try this A4 Word document. Also if you have access to an A3 printer the larger 10 gore 530. These courtesy of Ian McKinnon who has the clever bit of software.
Choose the colour material you are going to use. It is best to use unproofed ripstop as it's porosity gives it a better flight and it deploys more readily than proofed. This can frequently be obtained from kite shops as rolls of standard ripstop are sometimes not proofed all the way to the end. However standard proofed ripstop works OK. Genuine parachute silk is excellent but is very difficult to work. 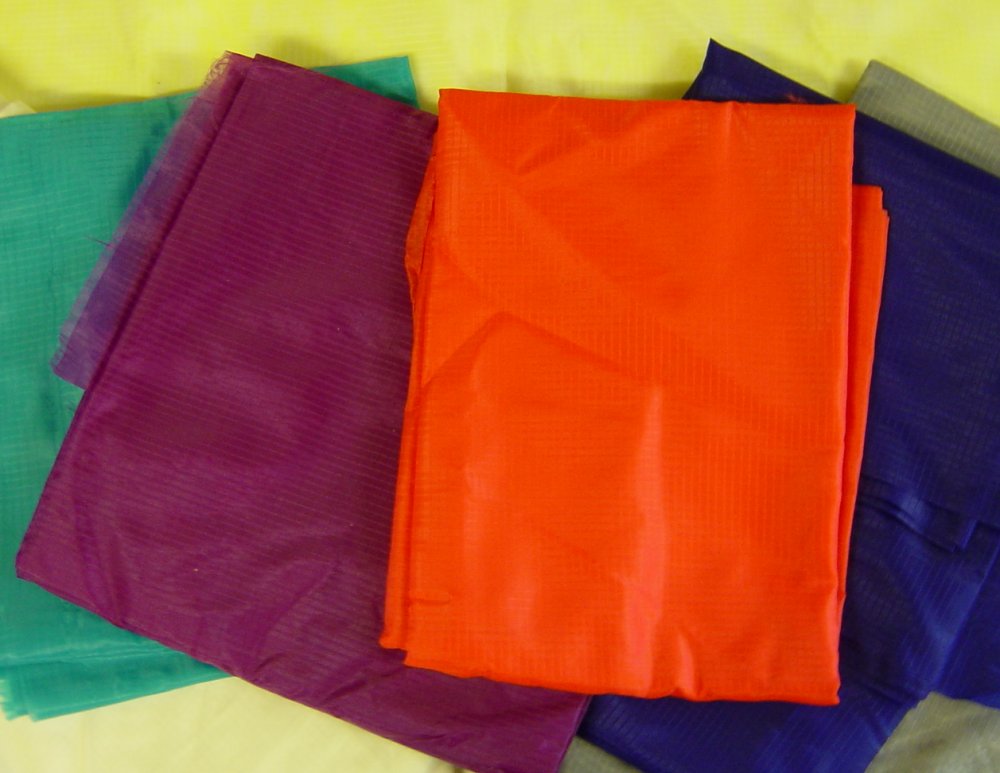 Use some bright colours as these are easier to see if it drifts a long way and make sure you use more than one colour as some show up better than others against differing backgrounds. Layout the material flat on your cutting board and put the template on top either vertically or horizontally along the weave.
![]() Keep all future parts in the same direction. Cut round the template using a hot cutter. (this saves having to do a double seam later). Turn the template over (this saves wear and tear) and top to bottom (this saves material) and cut out the next gore.
Keep all future parts in the same direction. Cut round the template using a hot cutter. (this saves having to do a double seam later). Turn the template over (this saves wear and tear) and top to bottom (this saves material) and cut out the next gore.![]() Continue like this until all gores are cut.
Continue like this until all gores are cut.
Lay 2 gore sections one on top of the other and starting at the thin end sew a seam 5mm from the edge.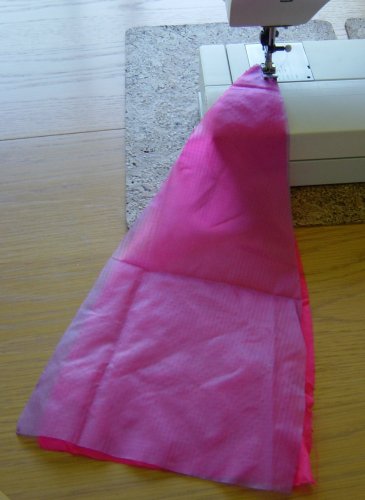 Unfold these two pieces and lay gore 3 on top of gore 2 and sew the next hem. Continue this
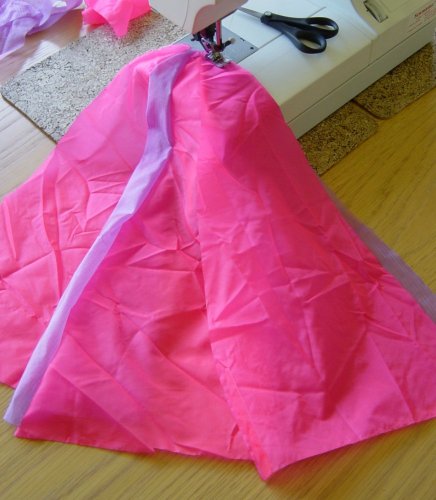 until all gores are sewn together to make a single sheet.
Turn over the material so that the seams are on top and fold a 5mm hem along the top edge. 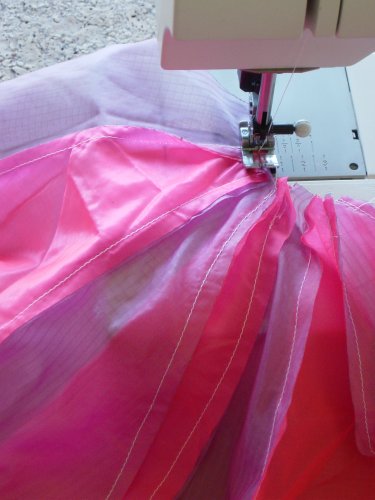 This requires a little persuasion as the material changes width. Hem this edge.
Now with all the pieces in-side-out lay the first section over the last and sew this seam to complete the hemisphere.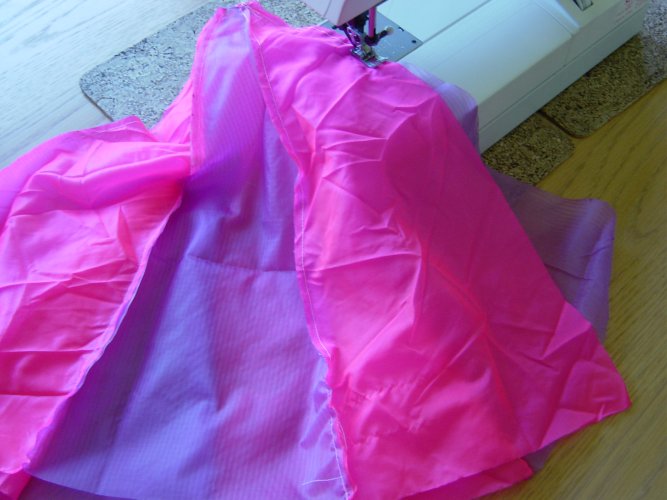 The whole thing can now be turned right way out and the shape should be apparent.
  If you have not used a hot cutter the seams should be laid flat and a second line of stitching done along each one. Hot cutting is preferable as unproofed ripstop tends to fray on the second stitch line.
At this point the shroud lines must be prepared. They should be about 1.5 X the gore length and the same number as gores except for the LARA 'chute where extras are required for the centre lines. I use a braided polyester line of about 20kg test on all 'chutes no mater what size as any thing smaller tends to get tangled very badly.![]()
Back to the sewing machine and starting half way round any gore on the main circumference make a single hem 5mm wide. Each time you get to a seam, double over the end of a shroud line and tuck it inside the hem as you sew over it.![]() This should fix the shroud line in place. Continue around the seam until all shrouds are fitted.
This should fix the shroud line in place. Continue around the seam until all shrouds are fitted.
When you get back to where you started fold the seam over a second time and lay the shroud lines outwards.![]() Using a tight multi stitch zigzag go right round the hem until you return to the start point.
Using a tight multi stitch zigzag go right round the hem until you return to the start point.
Gather the shroud lines into a bundle ensuring that the points where they attach to the canopy are together and cut the lines to the same length. Separate them into two bundles divided uniformly across two halves of the canopy. ![]() Attach these two bundles to the lead lines from the pack or harness.
Attach these two bundles to the lead lines from the pack or harness.
If you do not intend to use a full back pack system a suspension point must be fitted. The simplest way to do this is to sew a loop across the top vent hole and fit a split ring.![]()
Attach to unsuspecting soft object. Take to high altitude and release.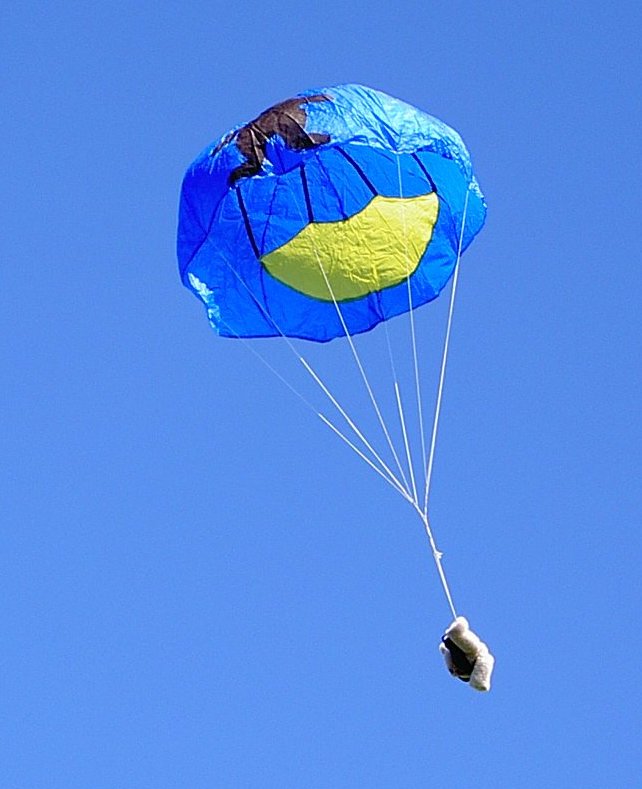 Most of all